
Change One Sentence. Not the Whole Lesson.
How we turn scripts and source materials into editable 3D scenes, reusable visuals and learning components — and make the next correction easier.
A subject expert corrects one sentence in a training script. Now someone has to find the affected slide, update the 3D animation, adjust the narration and check the exercise. The knowledge is available. Keeping every version of the lesson aligned is the expensive part.
We built a content production system for this problem in a medical education project. It connects expert material, authoring rules, 3D scenes and rendering pipelines in one editable workflow. The aim: less manual rebuilding when a lesson changes, and more reuse when the next lesson begins.
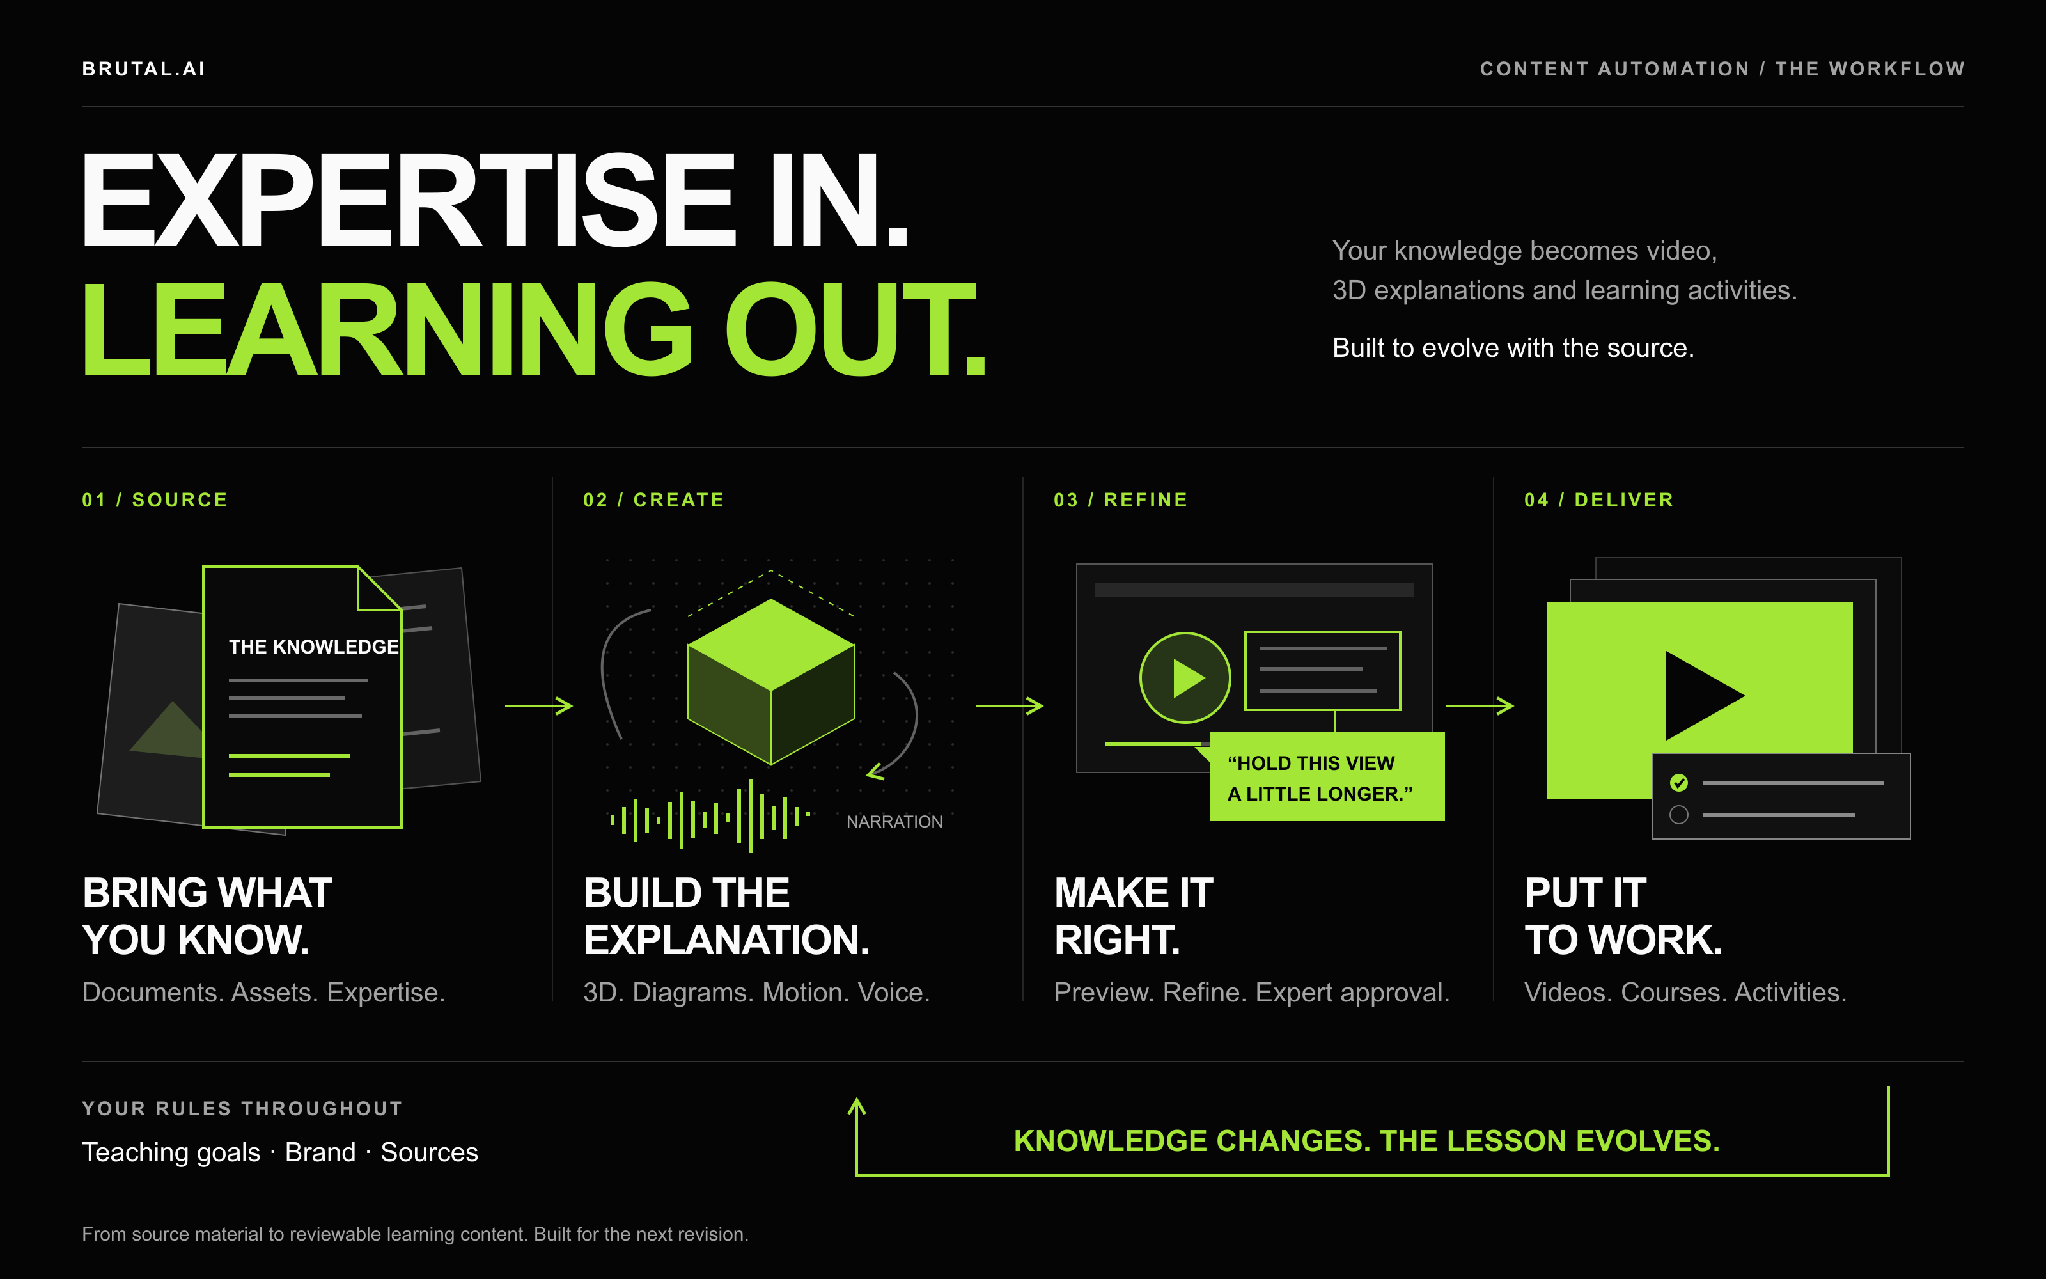
Let's follow a lesson through that workflow: start with the expert's explanation, decide how to show it, review the visual, and use it in a learning activity. The anatomy examples below show what those production decisions look like.
Give the lesson a shared foundation
The starting point is the material the team already has: PDFs, slide decks, reference images and scripts. For an anatomy lesson, the author identifies the explanation the learner needs to understand and the material that supports it.
We connect those excerpts to the scenes they inform. The script, the selected 3D model and the visual instructions stay associated with the same lesson revision. An editor can see which material a scene uses and return to an earlier version when needed.
That gives writers, visual designers and reviewers a shared starting point. A correction has a place to begin, without someone having to reconstruct the lesson from a folder of exported files.
“The knowledge is available. Keeping every version of the lesson aligned is the expensive part.”
Make the explanation editable
Next, the author decides what the learner should see: choose a camera angle, hide distracting structures, highlight a plane, and bring in a label at the right narration beat. We built authoring rules that capture those choices, and a 3D pipeline that builds and renders the scene from them.
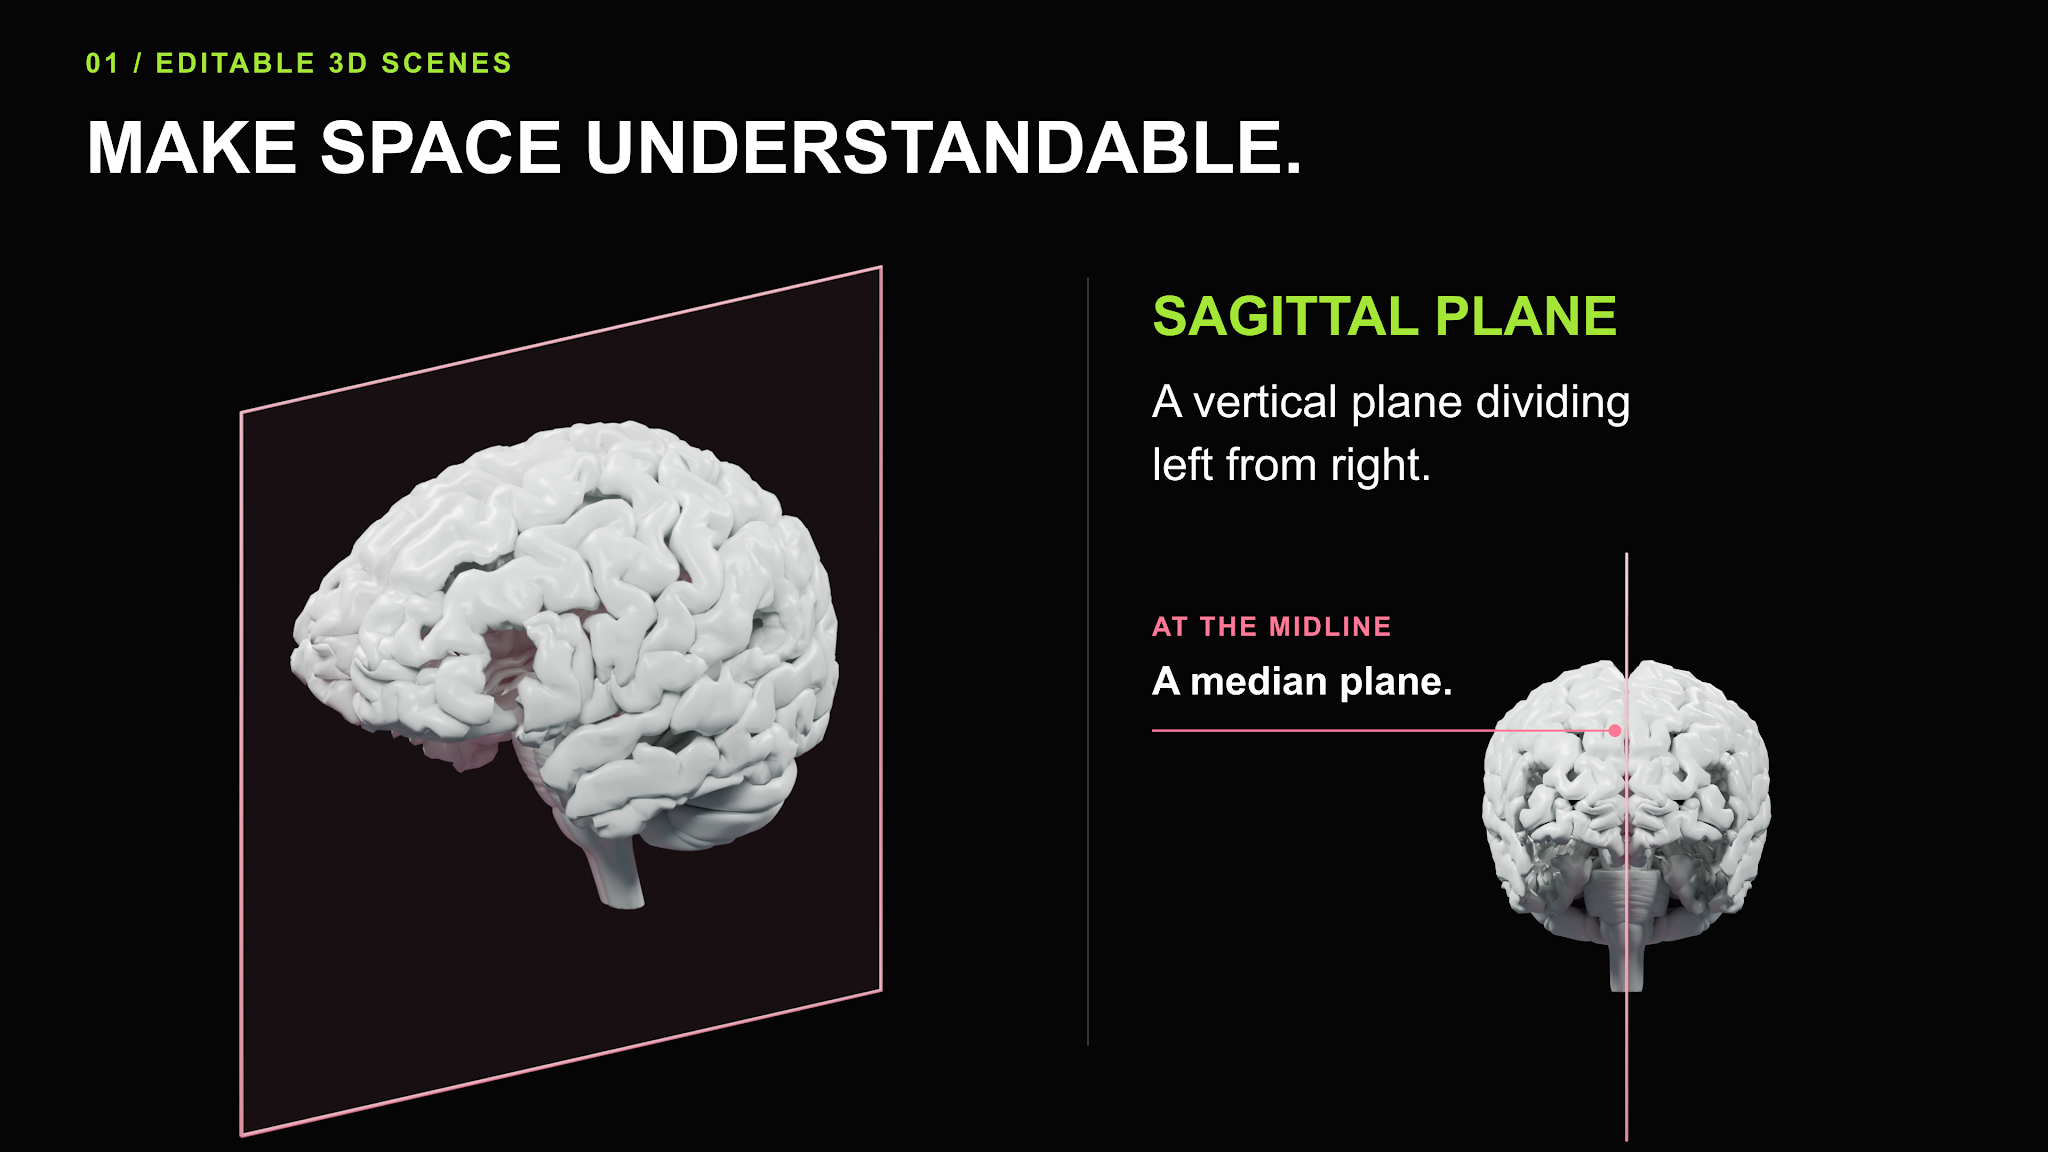
The same approach supports diagrams and motion graphics. We built reusable components for highlights, labels, layered anatomy, classification trees and curves. Authors set their content and timing, so the next explanation can reuse an established visual language.
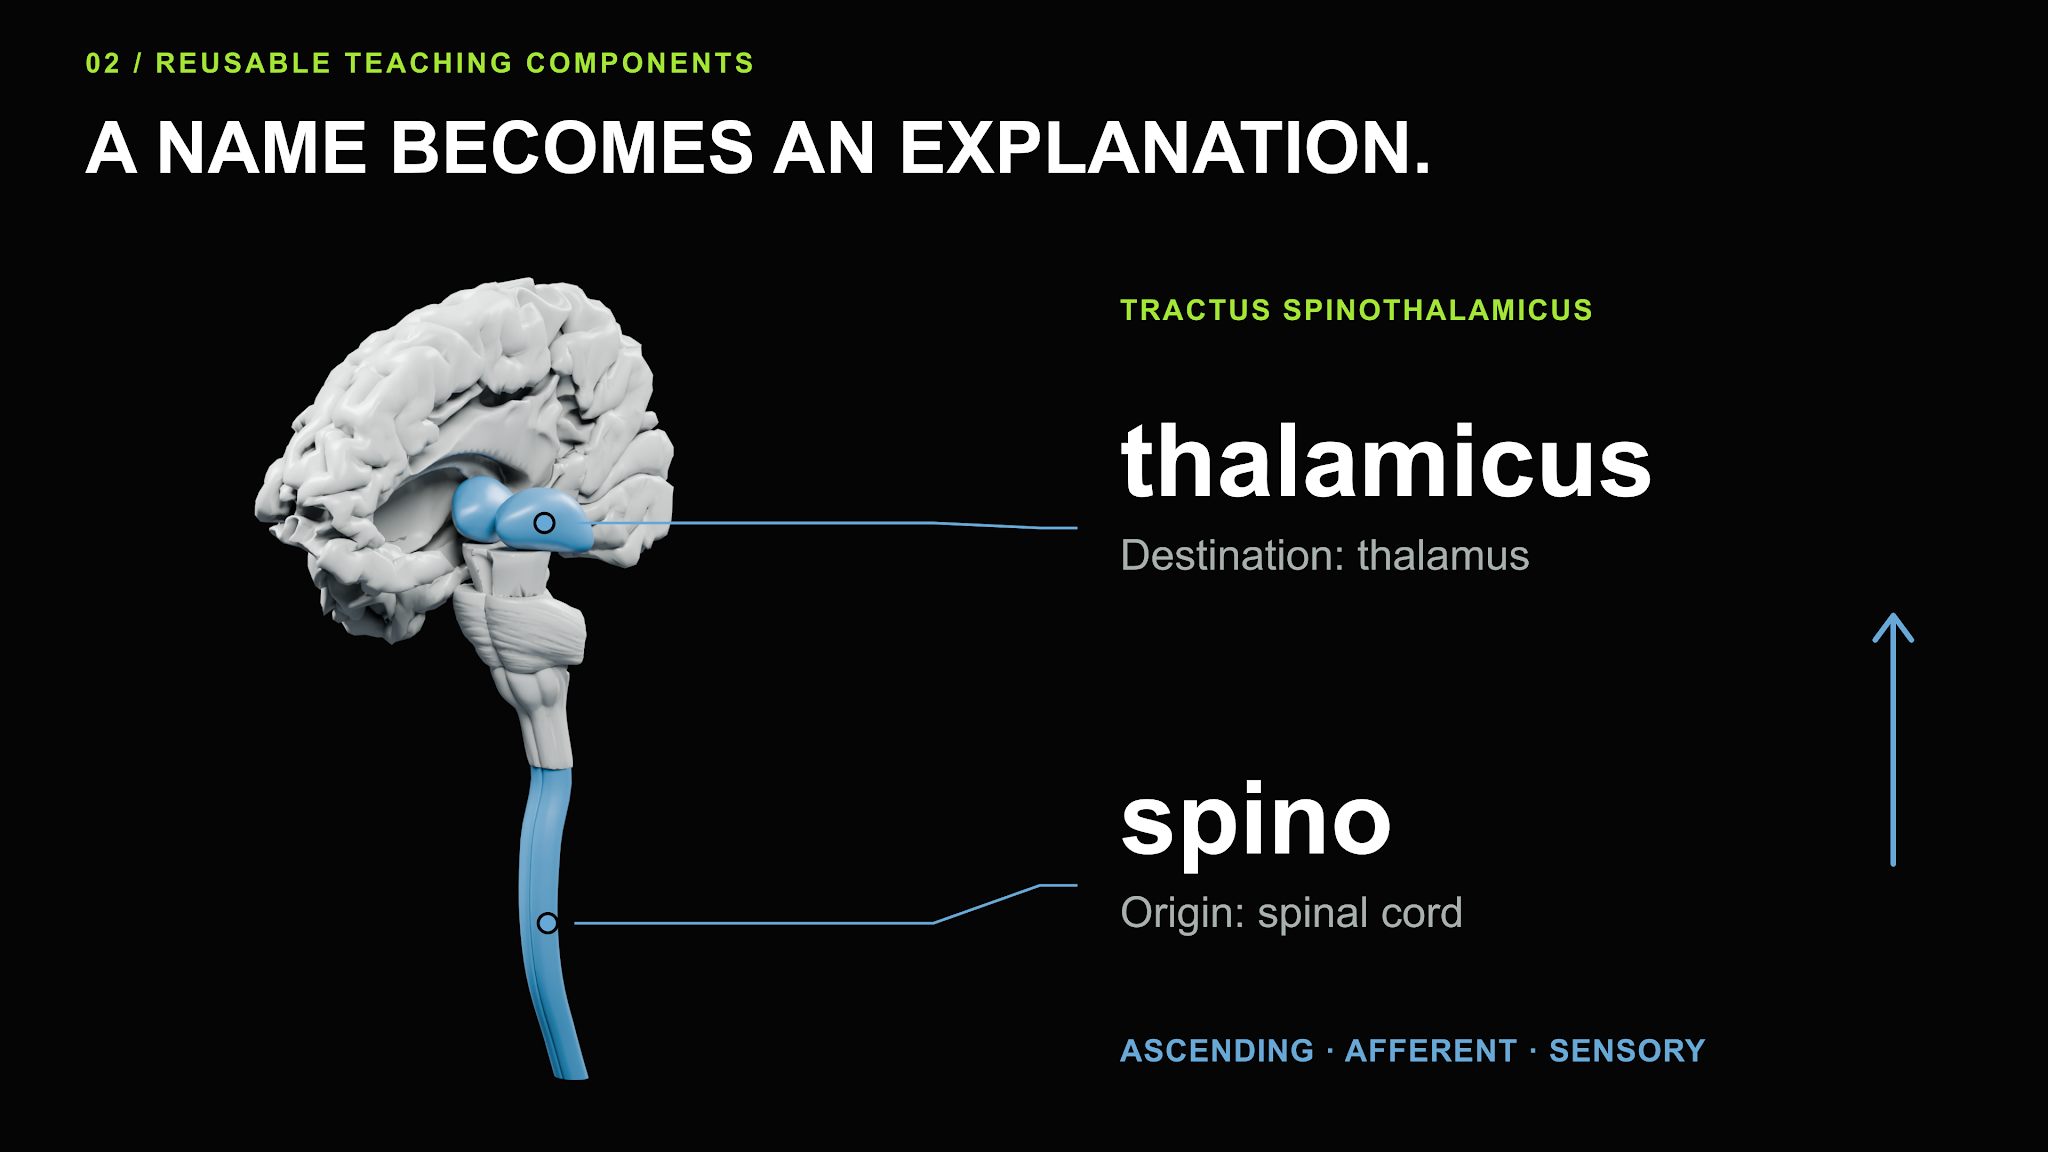
In the example below, a technical name becomes a relationship between two structures. Anatomy, emphasis and explanatory text are separate choices that can be revised together. The expert still decides whether the result teaches the right thing.
Review early. Correct the scene.
Before investing in a full animation, the team can inspect rendered stills: is the structure visible, is the angle useful, is the label legible? A narrated motion draft then makes pacing and synchronization available for review.
Suppose a reviewer asks for a clearer view of the midline. The author changes the camera and renders that scene again. If the explanation changes, the linked script and visuals give the team a defined place to check and revise. Each reviewed version remains identifiable.
That is the practical value of the pipeline: corrections can happen at the level of a scene, label or timing choice. The work already done on the rest of the lesson remains reusable.
Carry the explanation into practice
A learner also needs to use what they have seen. Alongside the video work, we prototyped interactive anatomy exploration and competency checks. The same visual material can support an explanation and an exercise — for example, moving from a labelled structure to asking the learner to identify it.
The approach also fits product training. Consider a manufacturer explaining a maintenance procedure: a manual supplies the steps, a 3D scene shows the component, and an exercise checks the learner's understanding. If the procedure changes, linked content gives the team a starting point for updating the lesson. It is a concrete next application of the workflow.
Start with one lesson
We build the authoring tools, the 3D and motion rendering pipelines, and the reusable learning components behind this process. Bring us a chapter, a product manual, or a lesson that is painful to maintain. We can map a first workflow around it — and show where automation can remove repeated production work.
Have a lesson that's painful to maintain?
Send us a chapter or a manual. We'll map a first workflow around it and show you where the repeated work disappears.